 |
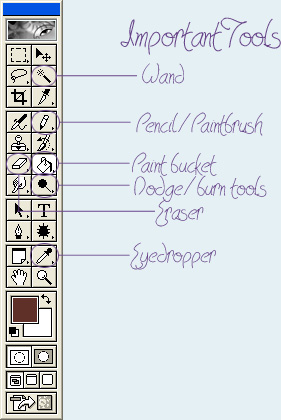
Okay, a breif overview of the tools you'll be using in this tutorial. |
For this tutorial you will need a doll base, (Your doll can be finished or not, I usually do hair at the end not before the clothes, because how the clothing looks effects how I decide to do hair, but this is me, not you.) A seven or eight color hair pallette. (I'll be tossing in a few at the end of the tutorial) and a paint program that supports layers. While created in Photoshop 6 this tutorial can be followed in any graphics progam with layers, however it will require a bit more knowledge of your program because I can't tell you exactly how things will look. But this tutorial won't require much advanced knowledge. |
|
 Color Pallette I'll be using |
|
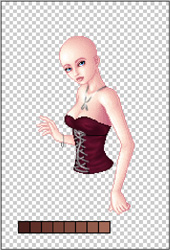
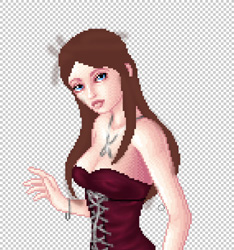
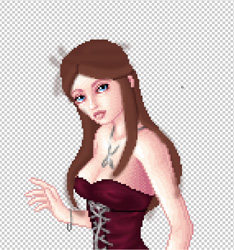
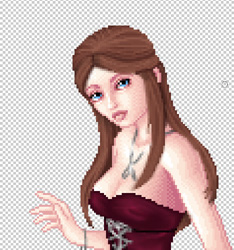
This is my doll. Base by Nica |
|
 |
|
Step One: |
|
 |
|
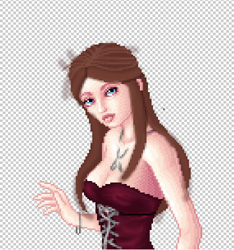
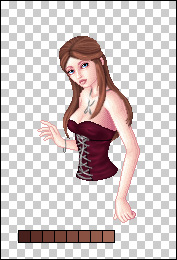
Using color /2/ on your pallette and a one pixel hard edged brush (Pencil) create your hair outline, you don't have to be neat, and cleaned up, this will all be filled in with the same color anyway. A few things to think about with hair, try to judge a good hairline, don't be afraid to back up and try again Ctrl+Z is the undo shortcut in most programs. If your clothing is windblown, make your hair blow in the same direction. remember that hair grows /out/ of the head, don't trace the scalp line, it rarely looks natural, following the curve of the "scalp" is okay for smoothed back hair, though. When you have pulled back hair, sometimes it looks better if you have bunches and places where the hair is clumped. Look at pictures or style your own hair the way you want your dolls to look, see how it lays, where it clumps. |
|
Step One-Point-Five |
|
 |
|
Fill in your outline. |
|
Step Two: |
|
 |
|
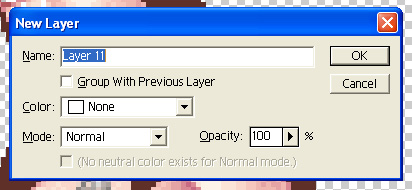
Make a new layer! (This is important) |
|
 |
|
 |
|
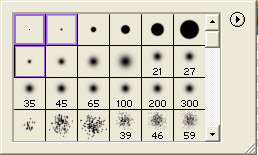
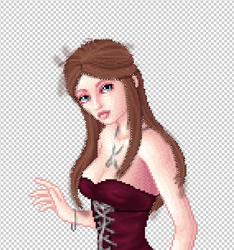
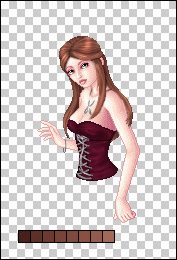
Now, you will need a soft edged brush 3-5 pixels big, at 50% oppacity. Pick up color three and start blocking in color. Don't worry if it's subtle it's supposed to be. And don't worry if it's you go over the edge of your outline below it'll all be cleaned up later. |
|
 |
|
Now block in a little more with color four. Use three where you'd get less light, further away from the face, where chunks would overlap, don't completely cover color two though, leave that where you'd have the heaviest shadows, behind the body, under the heaviest chunks of hair. Use four where you'd be getting a lot of light, the bangs/fringe the peices the fore peices that fall over the shoulders, a little on the shoulder, maybe. |
|
Step Three: |
|
 |
|
You can make a new layer here, but you don't have to. (I don't.) Now you need a 1 pixel soft edged brush at 100% oppacity, pick up color one, add in shadow lines, with hair leftdown, usually only at the part, or sometimes completely unnecessary if pulled completely back, if your hair like mine is pulled back in part, there'll be shadows where the hair ovelaps it's self, use this color sparingly. |
|
 |
|
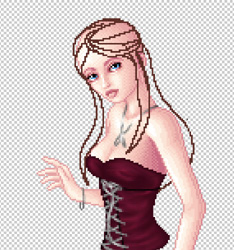
Now pick up color five, start painting strands that follow the movement of your hair, over color three. don't worry if they're not perfect, but try to keep them mostly going in the same direction. |
|
 |
|
Repeat with color six, overlaping/parelleling some of colors three four and five. And again repeat with color seven, overlaping/parelleling color four and six. This part can be difficult to explain... I can't tell you where you need strands cause I'm not looking at your doll. This is where having a visual reference for your hair is good, you can look at it and study where the lightest stands are, etc. You may want touse color eight, it depends on the doll, I usually don't except on large dolls. |
|
Step Four: |
|
 |
|
Go to your hair outline layer and select you magic wand. click anywhere outside the outline, now go back to your strand layer. The quickest way to clean this up would be to just press delete However I like the soft edges of the hair against the base and really only "need" to clean up the edges that'll be semi-transparent. So this is where the eraser comes in. I take a big hard edged eraser and erase outside the base, leaving the soft edges against the base. If I need to erase on the base I use a one pixel soft edged brush. It's really whatever looks good to you. |
|
 |
|
Step Five: |
|
 |
|
Now, when you're happy with what you've erased, deselect and merge your two hair layers together. Now, pick up yourburn tool (If you use PSP, I /highly/ recommend using the darken tool not the burn one, however) I use about a three to seven pixel soft edged brush, depending on where I'm darkening, highlight range and about a 25% exposure. I darken along the part, along the shadow lines. under the shoulders and where the hair overlaps or would lay in the shadow. |
|
Step six: |
|
 |
|
 |
|
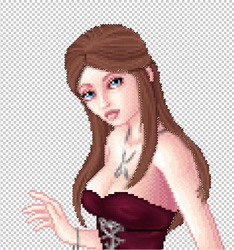
Basically my dodge settings and brush are identical to my burn ones, I dodge along the front and just a little on the shoulder. |
|
 |
|
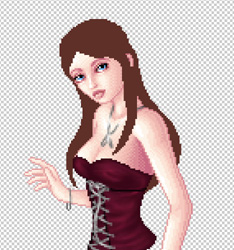
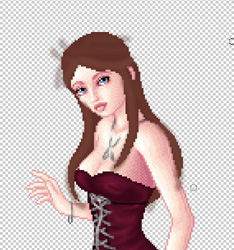
Now I add my light halo. |
|
 |
|
My hair is done, I hope this wasn't too confusing a tutorial for you. |
|
A few tips also, zoom in and then back out as you're painting strands, but I usually don't zoom in much when doing highlights so I can see what it looks like at the size I'm working on. |
|
 |
|
These pallettes are free to use with this tutorial or for anything, no link back is necessary. (But if you want to I would not complain,) please don't redistribute! |
|